Learn Pinta Online, from first click to final export.
This visual guide adapts the most useful concepts from the original Pinta manual to the web editor you can use today. No desktop installation, stale screenshots, or browser guesswork.
Every screenshot in this guide comes from Pinta Online.Guide contents
No matching chapterTry a tool name, command, format, or shortcut.
Start here
Quick start
Open Pinta Online and finish a small edit in four steps.
1
Create or open
Press Ctrl/⌘ + N, use File → Open, or drop an image onto the workspace.
2
Choose a tool
Pick a tool from the left toolbox. Its controls appear in the tool-options bar above the canvas.
3
Edit safely
Add layers before large changes. Use Ctrl/⌘ + Z or click any History entry to travel through your work.
4
Save the right format
Use OpenRaster for editable layers, PNG for lossless pixels and transparency, or JPEG/WebP for a compact final image.
Chapter 1
About Pinta Online
A free, open-source bitmap image editor with a familiar paint workflow and a layered approach.
Painting made simple
Pinta Online is the browser-based port of Pinta. It is approachable enough for a quick crop, annotation, or sketch, while supporting layers, precise selections, blend modes, adjustments, and effects for more involved work.
A bitmap image is a grid of pixels. Zooming in reveals that grid; painting or applying an effect changes pixel values on the active layer. Pinta Online keeps that direct model visible instead of hiding it behind a complex document system.
What the web port adds
Runs on any modern desktop browser without an installer.
Can be installed as an offline-capable Progressive Web App.
Restores documents, layers, selections, zoom, tabs, and complete history locally.
Uses Pinta-style shortcuts while preventing the browser from stealing editor commands.
Offers optional, built-in ports of selected Pinta add-ins.
Chapter 2
Meet the workspace
The interface keeps the canvas central and puts each type of control in a predictable place.
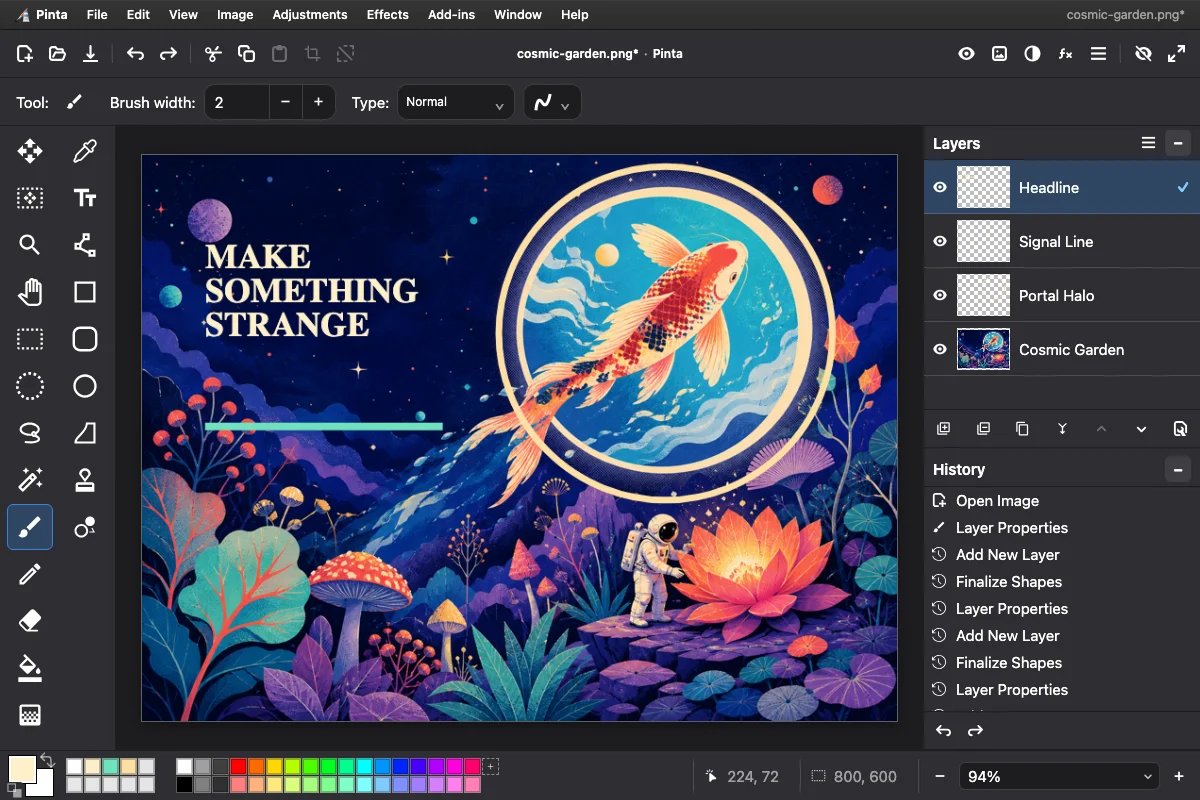
The complete workspace. Menu bar and common actions above; tools at left; layers and history at right; palette and document tabs below.
1
Menu bar
File, Edit, View, Image, Adjustments, Effects, Add-ins, Window, and Help expose the complete command set.
2
Main toolbar
Fast access to New, Open, Save, Undo, Redo, clipboard commands, Crop, and Deselect.
3
Tool options
Changes with the active tool. Set brush width, selection mode, tolerance, shape style, text formatting, and more.
4
Toolbox
Selection, navigation, paint, text, shape, clone, and recolor tools. Hover an icon to see its name, key, and usage hint.
5
Canvas
The editable image. Two-finger trackpad gestures zoom around your pointer; Pan or middle-drag moves the view.
6
Layers & History
The active document’s layer stack and complete, branch-aware edit history.
7
Palette
Primary and secondary colors, palette management, and exact color editing.
8
Document tabs
Switch between open images. Each tab keeps independent layers, selection, history, zoom, and dirty state.
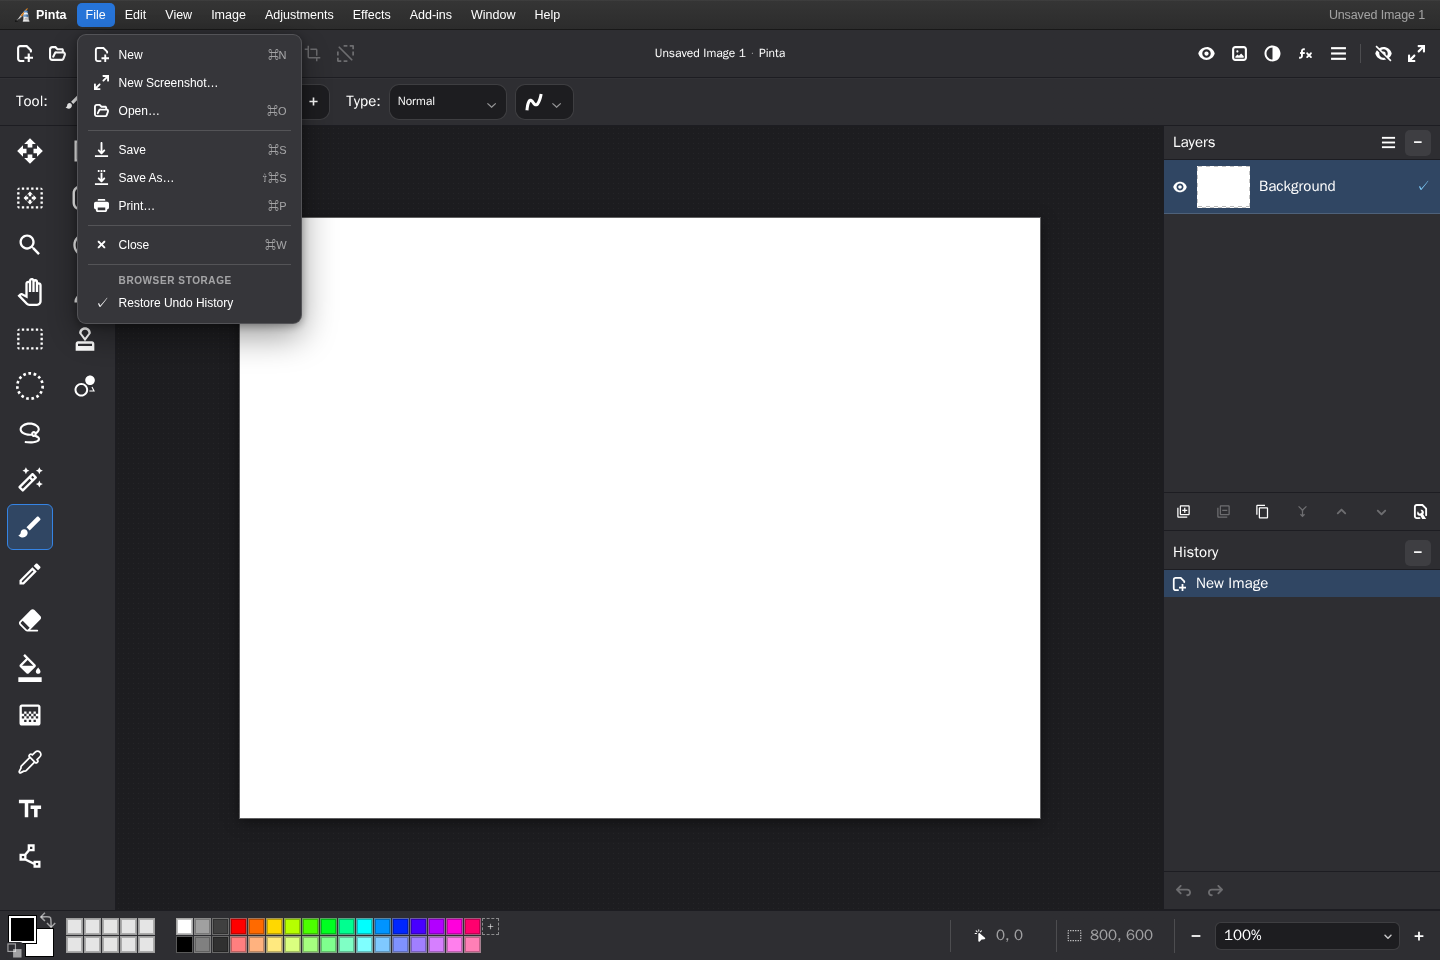
Desktop-style menus in the browser. Commands advertise the same Ctrl/Command accelerators used by Pinta.
Customize the view
Use View to switch the toolbar, status bar, toolbox, palette, layers, history, rulers, canvas grid, pixel grid, dark/light theme, fullscreen, and distraction-free mode. These choices are remembered locally.
Chapter 3
Files and projects
Start blank, open local images, capture a browser surface, or import a file as a layer.
+
New image
Choose File → New or press Ctrl/⌘ + N. Enter width, height, background, and orientation.
↥
Open image
Choose Open, press Ctrl/⌘ + O, or drag one or more files onto the app.
▣
New screenshot
Choose a browser tab, window, or display from the browser’s capture prompt. The captured frame opens as a new document.
◫
Import into layer
Use Layers → Import from File when an image belongs inside the current composition rather than in another tab.
Formats you can open
OpenRaster (.ora), PNG, JPEG, WebP, AVIF, GIF, BMP, TIFF, SVG, ICO, PPM, and TGA. OpenRaster is the best interchange format for layered projects. Other image formats open as flattened pixel layers.
Chapter 4
Core concepts
Images, layers, selections, and history are the four ideas behind nearly every edit.
Image
The full rectangular document: its pixel dimensions, canvas, layers, and saved file format.
Layer
A transparent sheet of pixels in the stack. Work on separate layers so an element can be hidden, reordered, blended, transformed, or removed independently.
Selection
An active pixel mask. Painting, deletion, adjustments, and effects are constrained to the selected region until you deselect it.
History
A timeline of document states. Undo, redo, or click an earlier entry. If you edit from an older point, Pinta Online preserves the meaningful branch for that document.
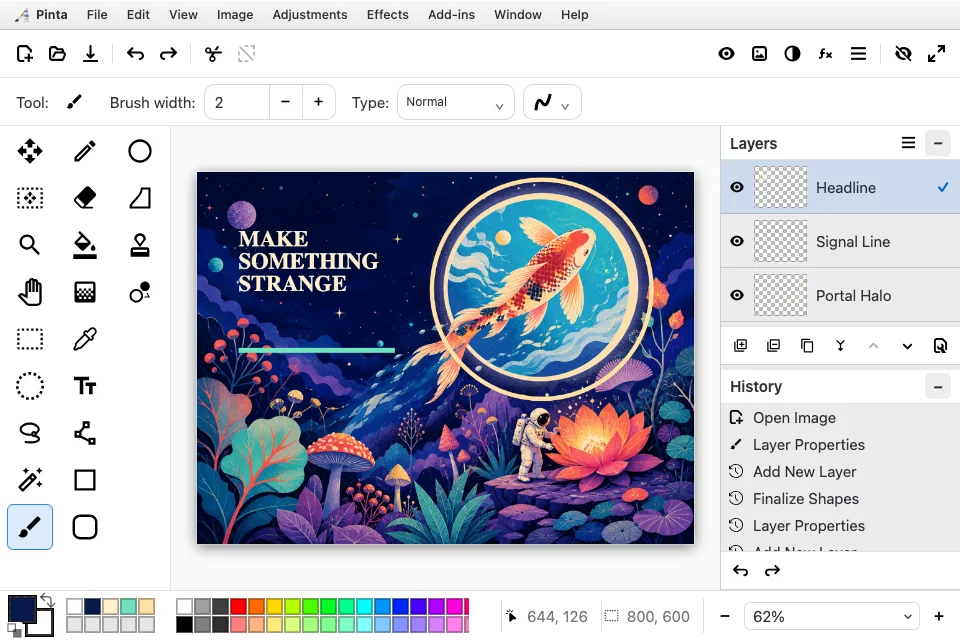
The same concepts and controls are available in both light and dark themes.
Chapter 5
Select and move pixels
Selections isolate the part of a layer you want to move, copy, erase, fill, crop, adjust, or filter.
Rectangle Select
Drag a rectangular region. Hold Shift for a square, then resize with the blue handles.
Ellipse Select
Drag an elliptical region. Hold Shift for a circle.
Lasso Select
Draw a freeform boundary around an irregular subject.
Magic Wand
Click pixels of similar color. Adjust tolerance and choose contiguous or global matching.
Combine selection regions
The selection mode in the tool-options bar controls the next gesture: Replace, Union, Exclude, XOR, or Intersect. You can also Select All, Deselect, Invert, Offset, Fill, Erase, or Crop to Selection from the Edit and Image menus.
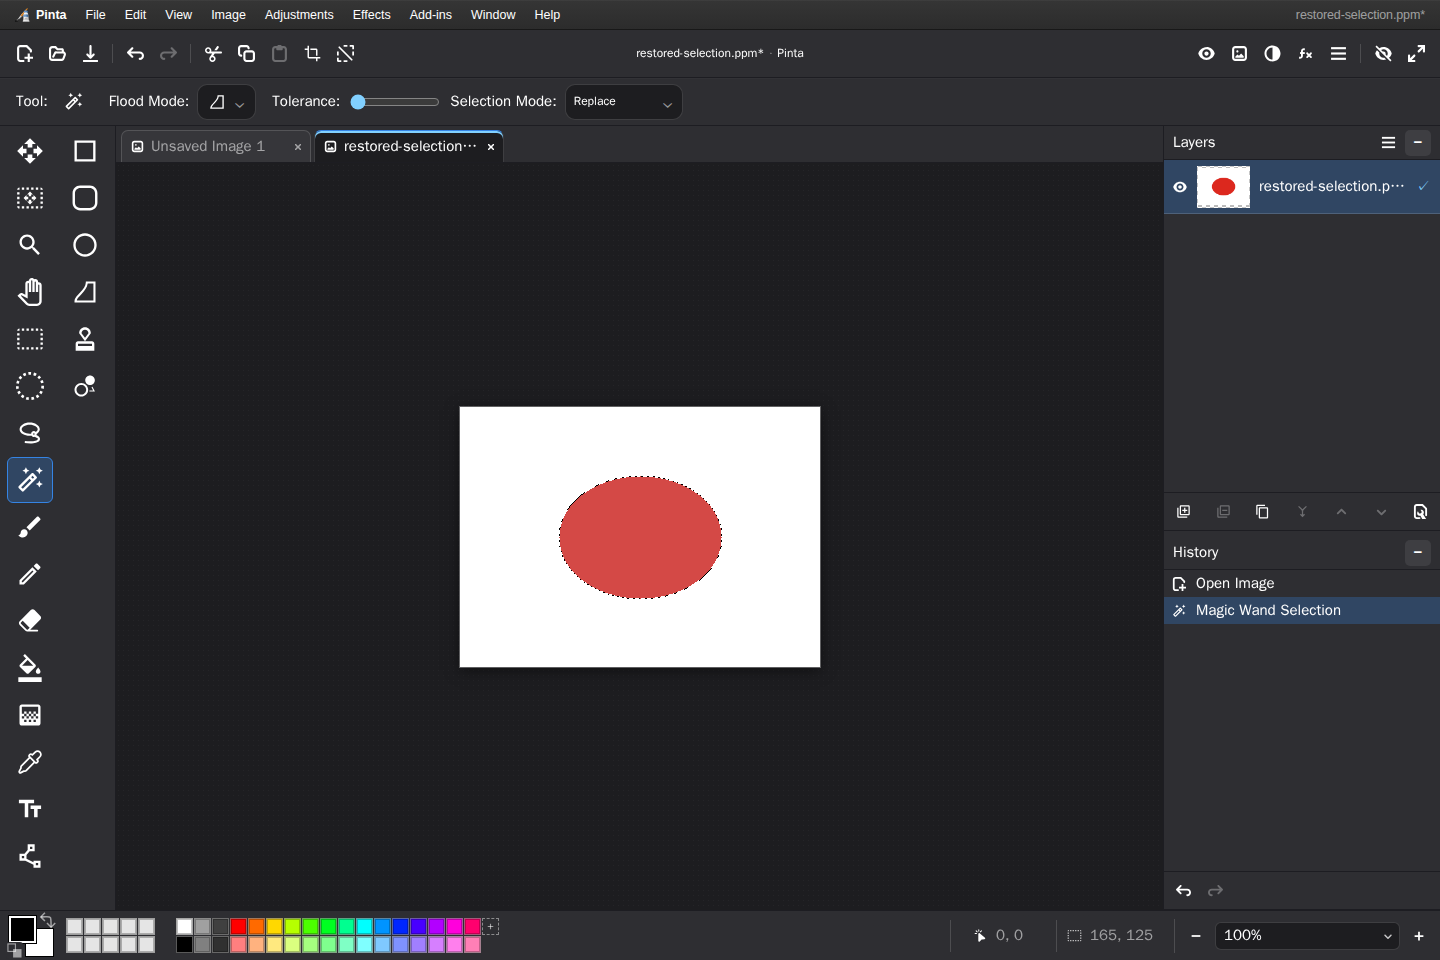
Selections survive restoration. Close and reopen the browser and the active Magic Wand mask, tool, marching ants, history, and unmodified image pixels return together.
Move Selected Pixels
Moves the image content inside the selection. Use it when the object itself should change position.
Move Selection
Moves only the selection outline. The underlying pixels remain where they are.
Chapter 6
Drawing and color
Choose colors from the palette, then paint, fill, blend, sample, erase, or replace pixels.
Primary and secondary colors
Click a palette swatch to choose the primary color, or right-click it to choose the secondary color. Click either large color well to open the complete color editor, switch which color you are changing, and set hue, saturation, value, RGB, hexadecimal, or alpha precisely. The on-canvas Color Picker tool samples directly from the image.
Tool-specific controls stay in one horizontal bar above the canvas.
Paintbrush
Freehand strokes with configurable brush, width, and antialiasing.
Pencil
Hard one-pixel marks for exact pixel art.
Eraser
Removes pixels from the active layer to transparency.
Paint Bucket
Fills a contiguous or global color region using a tolerance.
Gradient
Drags a smooth transition between the primary and secondary colors.
Recolor
Replaces a sampled color while respecting tolerance.
Clone Stamp
Copies pixels from a source point to a destination stroke.
Block Brush add-in
Optional hard-edged square strokes for chunky pixel work.
Manage palettes
Use the dashed + swatch at the end of the palette, or choose Edit › Palette › Add Primary Color, to save the current primary color. Double-click, Ctrl/Command-click, or middle-click an existing swatch to edit it with the full color editor. The Edit menu can also open, save, reset, or resize a palette. Pinta Online supports Paint.NET, GIMP, and PaintShop Pro palette files so useful color sets can travel with your workflow.
Chapter 7
Work with layers
Separate the background, artwork, text, and corrections so each can be changed without damaging the others.
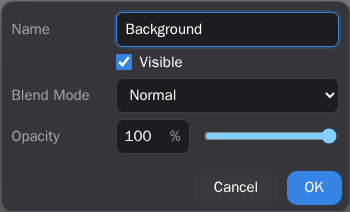
AddUse the plus button or press Ctrl/⌘ + Shift + N.
NameOpen Layer Properties and give the layer a purpose-driven name.
OrderMove layers up or down; higher layers cover lower layers where pixels overlap.
BlendAdjust opacity or choose one of 16 blend modes to control how the active layer combines with those below it.
Layer Properties controls name, visibility, blend mode, and opacity.
Common layer commands
Add, delete, duplicate, and import from file.
Merge the active layer down or flatten the entire image.
Flip horizontally or vertically.
Rotate and zoom a layer independently.
Drag to reorder and toggle the eye to hide or show.
Blend modes
Normal preserves the layer as drawn. Multiply darkens; Screen lightens; Overlay increases contrast. Additive, Color Burn, Color Dodge, Reflect, Glow, Difference, Negation, Lighten, Darken, XOR, and other modes support compositing experiments.
Chapter 8
Text, lines, and shapes
Build annotations, diagrams, posters, and interface mockups directly on the canvas.
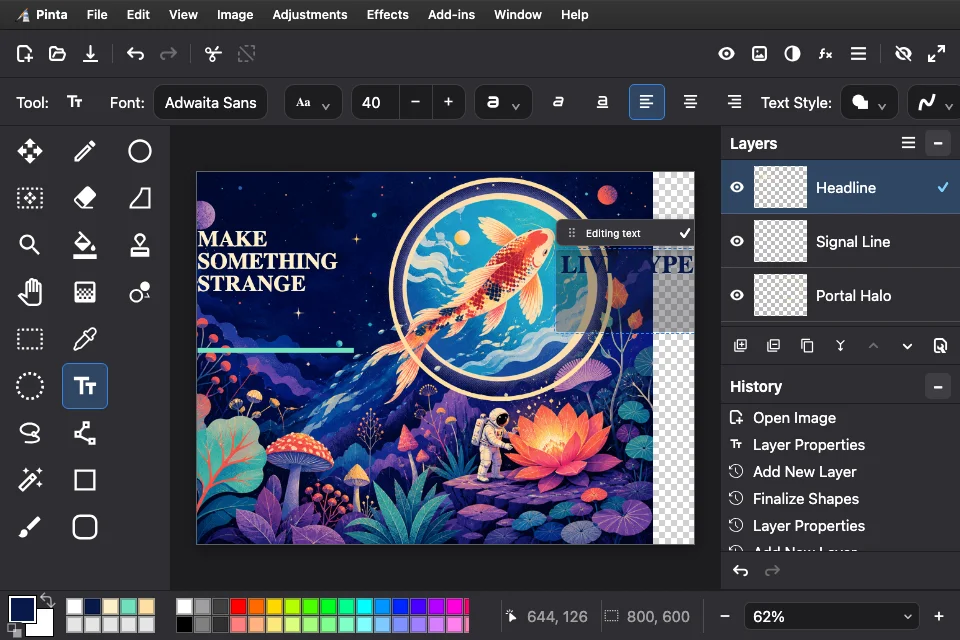
Text remains editable on the canvas until you commit it.
Add text
Select TextPress T, then click where the text should begin.
Type and positionEnter multiple lines and drag the editing box into place.
CommitUse the toolbar action or the shown keyboard command to rasterize the text onto the active layer.
Create shapes
Line/Curve, Rectangle, Rounded Rectangle, Ellipse, and Freeform Shape share outline width, fill style, dash pattern, and antialiasing controls. Draw first, then use live handles to refine geometry before committing. Hold Shift where offered to constrain proportions.
Chapter 9
Transform images and canvas
Rotate, flip, resize, crop, and change the working area without confusing image pixels with the canvas that contains them.
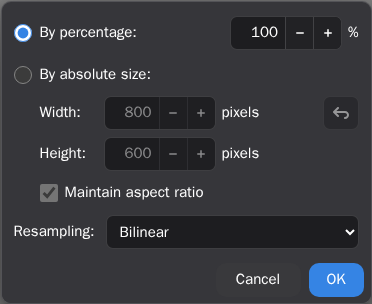
Resize Image
Resamples the entire composition to new pixel dimensions. Preserve aspect ratio to avoid stretching.
Resize Canvas
Changes the working boundary without scaling existing pixels. Choose an anchor to decide where added or removed space goes.
Resize by percentage or exact dimensions and choose the resampling method.
Rotate, flip, and crop
The Image menu rotates the whole composition 90° clockwise, 90° counter-clockwise, or 180°, and flips it horizontally or vertically. Layer commands transform only the active layer. Crop to Selection keeps the selected rectangle; Auto Crop trims uniform outer space.
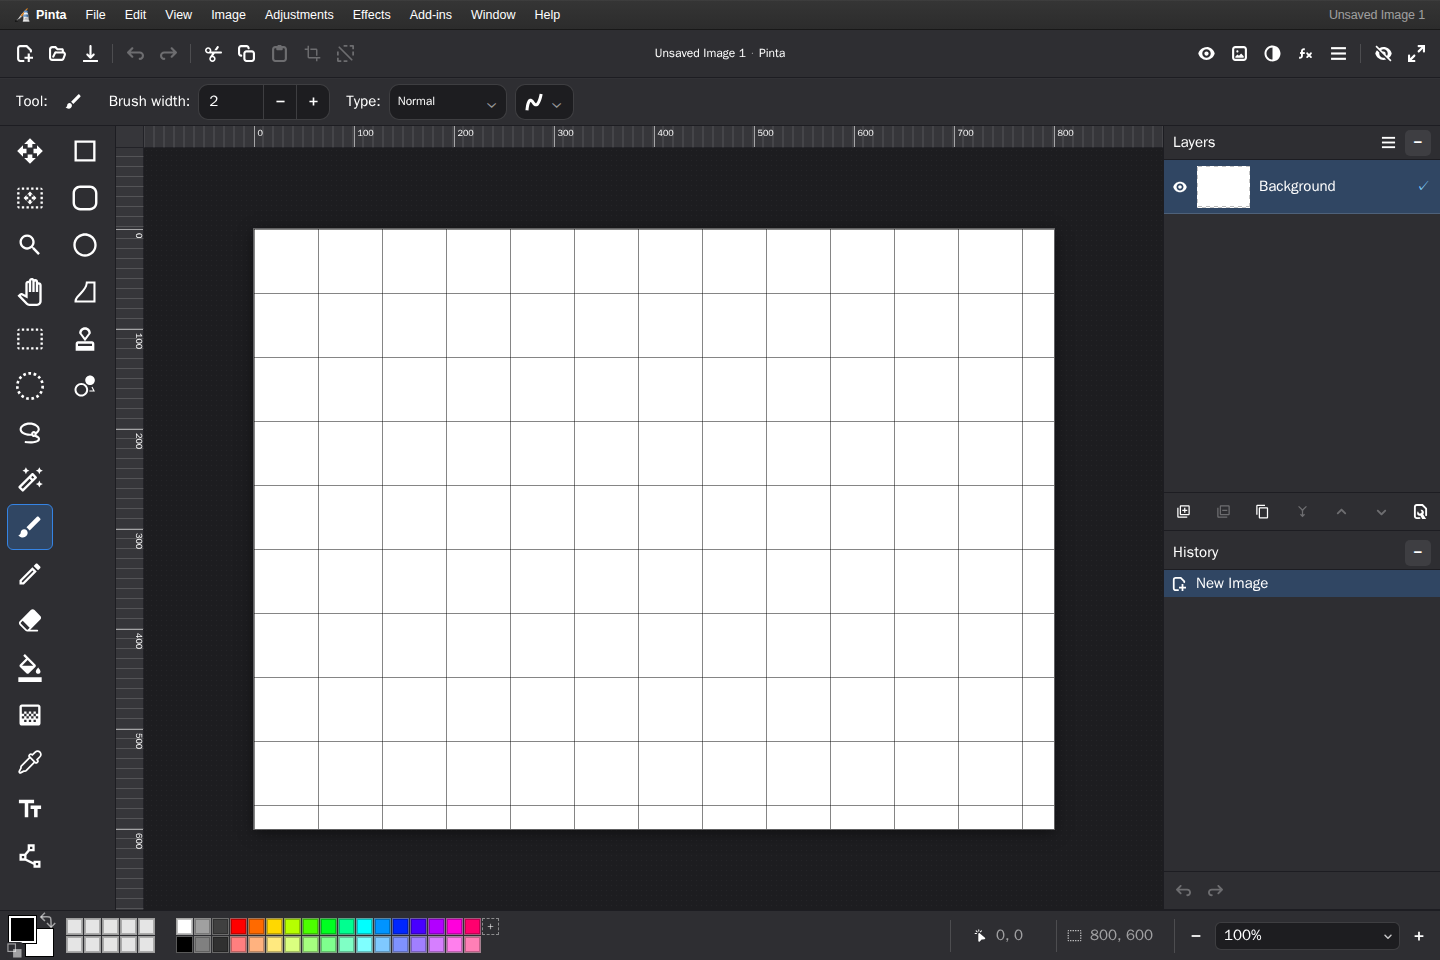
Rulers and grids help place and size elements without changing exported pixels.
Zoom and navigate
Use the Zoom tool, status control, +/−, Best Fit, or Actual Size. A two-finger trackpad pinch zooms around the pointer. Use Pan when the zoomed canvas is larger than the viewport.
Chapter 10
Adjustments and effects
Correct color and tone, retouch photos, generate textures, or transform an image with parameterized effects.
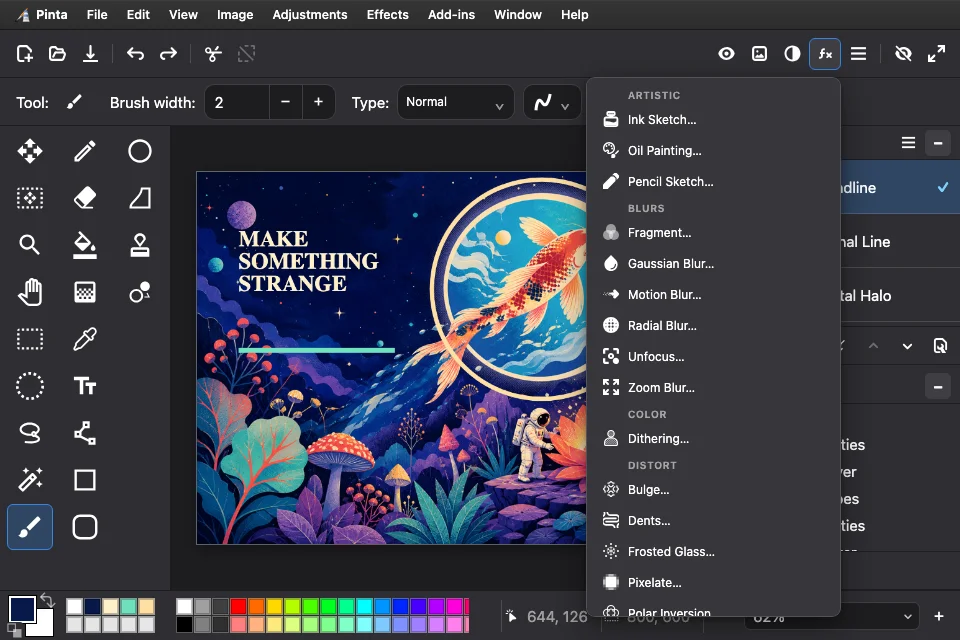
Effects follow Pinta’s familiar categories and run outside the main UI thread.
Adjustments
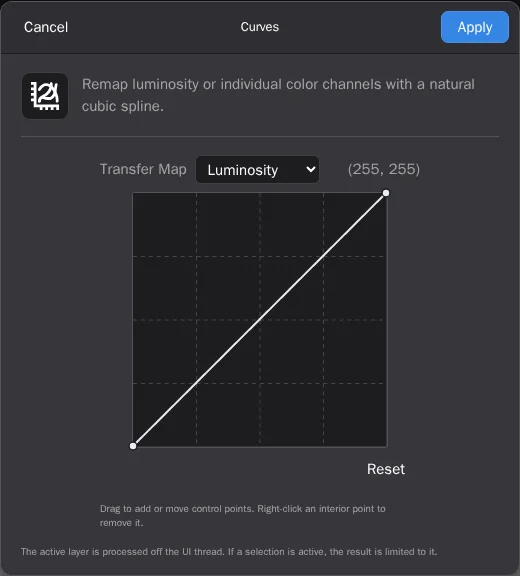
Auto Level, Black and White, Brightness/Contrast, Curves, Hue/Saturation, Invert Colors, Levels, Posterize, and Sepia.
Blur
Fragment, Gaussian, Motion, Radial, Unfocus, and Zoom Blur.
Choose the targetActivate the intended layer and optionally create a selection to limit the changed pixels.
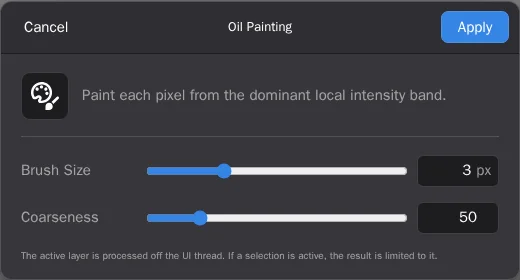
Open the dialogSelect an adjustment or effect and tune its parameters.
ApplyThe result becomes one named History entry, so it can be undone or revisited predictably.
Chapter 11
Repair and restore photos
Combine selections, cloning, noise tools, and restrained adjustments for believable corrections.
◎
Red eye
Select the affected eye area, then apply Effects → Photo → Red Eye Removal. A tight selection protects surrounding skin tones.
⁙
Noise
Use Median or Reduce Noise for speckles and compression artifacts. Zoom to 100% before judging detail loss.
✣
Clone Stamp
Set a clean source point, then paint over a distraction with nearby texture. Use short strokes and resample often.
◌
Object removal
Select and erase an object on a separate layer, then rebuild the gap with Clone Stamp, selections, and soft brushwork.
A practical repair order
Duplicate the source layer, correct broad tone with Levels or Curves, remove noise, repair local defects, then sharpen lightly at final output size. Keep comparison layers so you can reduce opacity or discard an overcorrection.
Chapter 12
History, restoration, and offline work
Pinta Online treats browser storage as a resumable workspace—not as a flattened recovery image.
Complete document history
Every document owns its timeline. Undo and redo with shortcuts or click a History entry. The restored workspace keeps the actual labels, index, clean state, layer snapshots, and selection masks; it does not replace them with a generic “Restored Session” state.
Automatic local restoration
After a change settles, IndexedDB saves documents, layer pixels, active selections, history, zoom, filename, dirty state, and open-tab order. Closing and reopening the browser restores that complete workspace on the same browser profile.
Install and work offline
Use your browser’s Install App action to give Pinta Online a dedicated window. Once the app shell and assets are cached, the editor can start offline; local files and restored work remain available without a server round-trip.
Chapter 13
Save, export, and print
Choose a format based on whether you need editable structure, transparency, lossless pixels, or a small delivery file.
Best for transparency, screenshots, diagrams, and crisp graphics.
JPEGCompact photo
Lossy and flattened; choose quality carefully and expect transparency to be removed.
WebPWeb delivery
Compact modern output with a quality control.
BMP / TIFFDesktop interchange
Deterministic bitmap output and alpha-aware TIFF output for compatible image applications.
PPM / TGAGraphics pipelines
Deterministic interchange formats useful in compatible graphics and testing workflows.
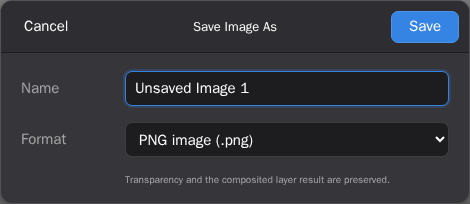
Save As lets you choose the filename and output format explicitly.
Save versus Save As
Save repeats the current document’s chosen name and format when browser capabilities allow it. Save As always asks for a filename and format. Save All processes every changed tab. If the browser cannot write back to the original local file, it downloads the result instead.
Print
File → Print freezes the current composite into an isolated preview with orientation, scaling, margin, and centering controls before handing it to the browser’s system print dialog. Returning from Print or Cancel disposes that frozen surface so a later print cannot use stale pixels.
Chapter 14
Keyboard shortcuts
Use Ctrl on Windows/Linux and Command on macOS unless a row explicitly says Ctrl.
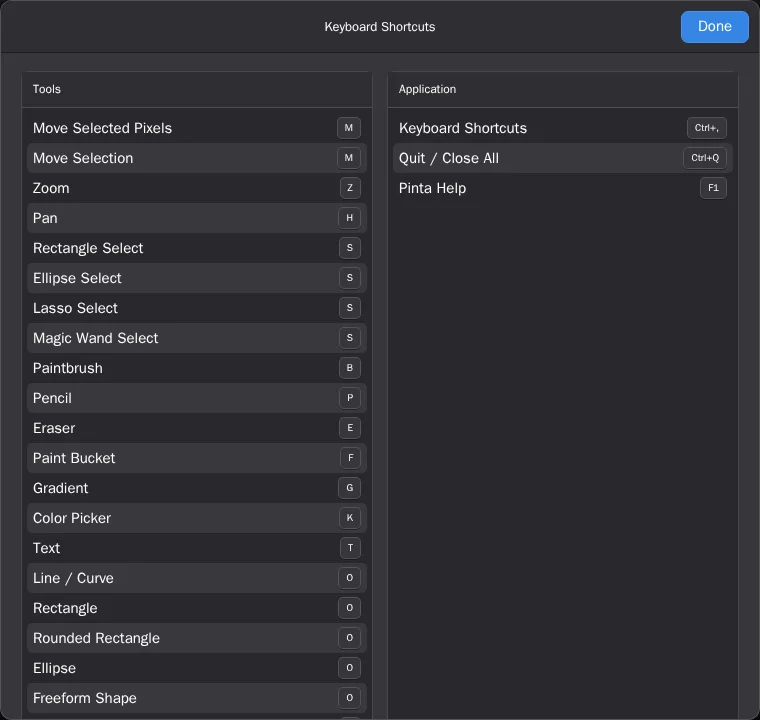
Press Ctrl/⌘ + , to open the complete in-app shortcut reference.
File
New image
Ctrl/⌘ N
Open
Ctrl/⌘ O
Save
Ctrl/⌘ S
Save As
Ctrl/⌘ Shift S
Print
Ctrl/⌘ P
Close
Ctrl/⌘ W
Edit
Undo / Redo
Ctrl/⌘ Z / Ctrl/⌘ Shift Z
Cut / Copy / Paste
Ctrl/⌘ X / C / V
Select / Deselect all
Ctrl/⌘ A / Ctrl/⌘ Shift A
Erase / Fill selection
Delete / Backspace
Invert selection
Ctrl/⌘ I
View & documents
Zoom in / out
+ / −
Best fit / Actual size
Ctrl/⌘ B / Ctrl/⌘ 0
Fullscreen / Tool windows
F11 / F12
Next / previous tab
Ctrl/⌘ Tab / Ctrl/⌘ Shift Tab
Document 1–9
Alt 1–9
Image & layers
Resize image / canvas
Ctrl/⌘ R / Ctrl/⌘ Shift R
Crop to selection
Ctrl/⌘ Shift X
Add / duplicate layer
Ctrl/⌘ Shift N / Ctrl/⌘ Shift D
Merge layer down
Ctrl/⌘ M
Layer properties
F4
Tool keys
M move tools · Z zoom · H pan · S selection tools · B paintbrush · P pencil · E eraser · F bucket · G gradient · K picker · T text · O shapes · L clone · R recolor
Chapter 15
Help and troubleshooting
Use the local guide first, then report web-editor problems to the Pinta Online repository.